Configure a Project
The Project Detail view is where you connect assets and agents for a specific project.
-
Open the project
- Go to Projects and select a project to open its details.
- If you do not have any managed projects yet, use Add Project or the Drop Zone to add a working folder.
-
Add assets
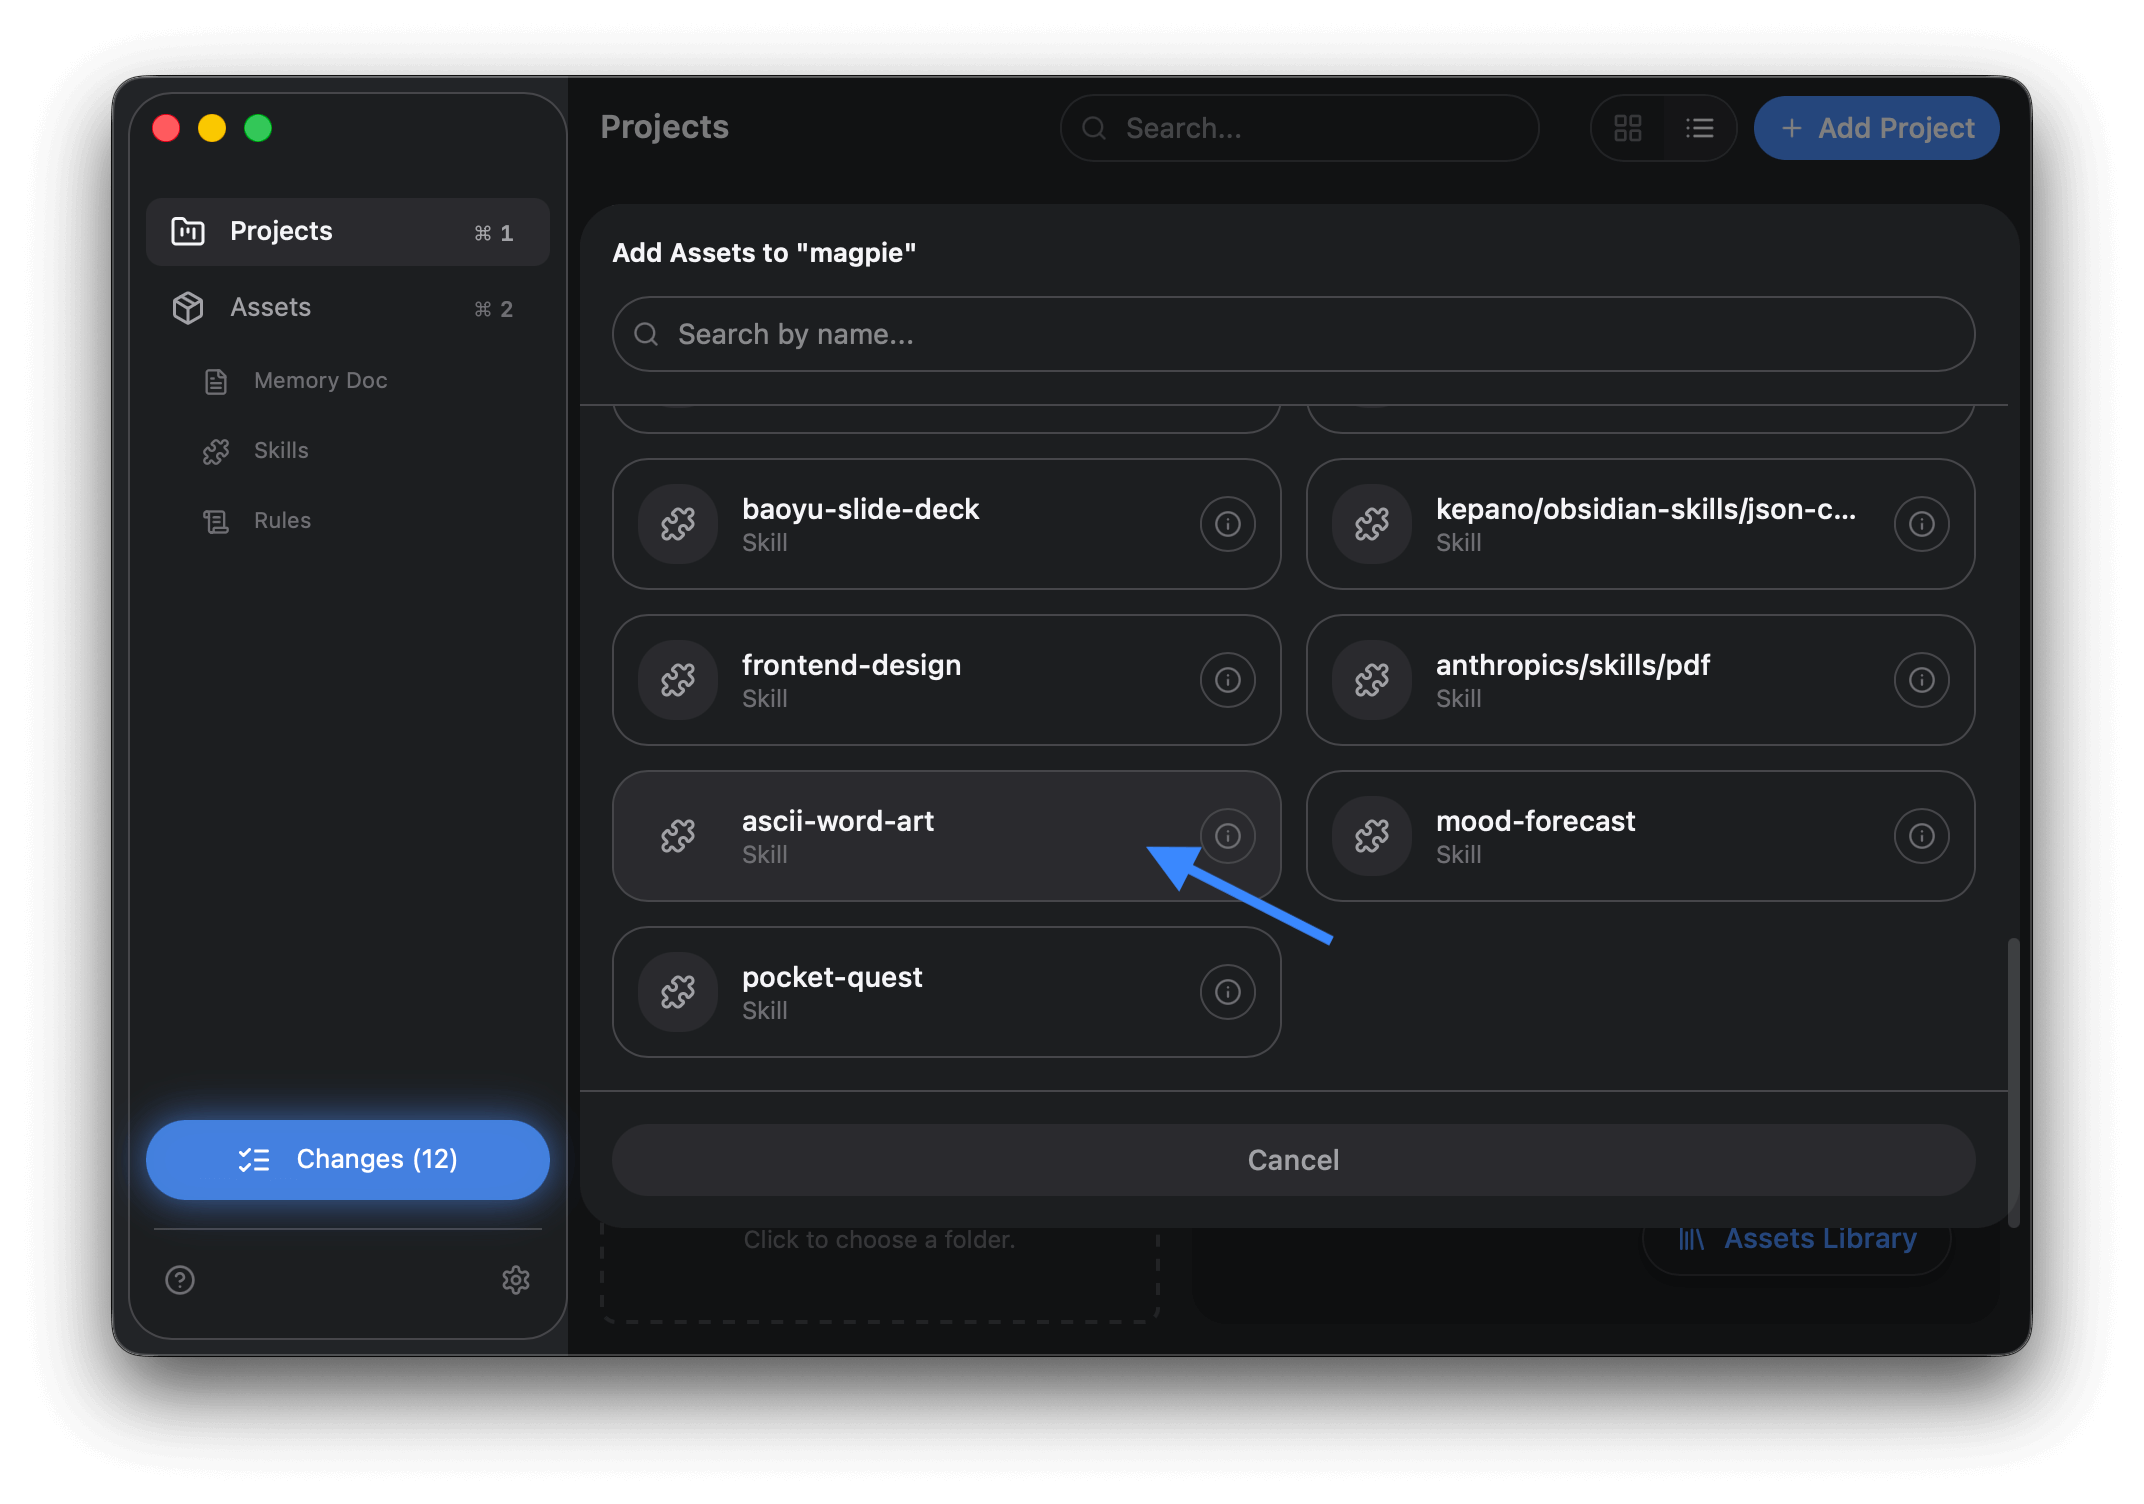
- Click Assets Library.
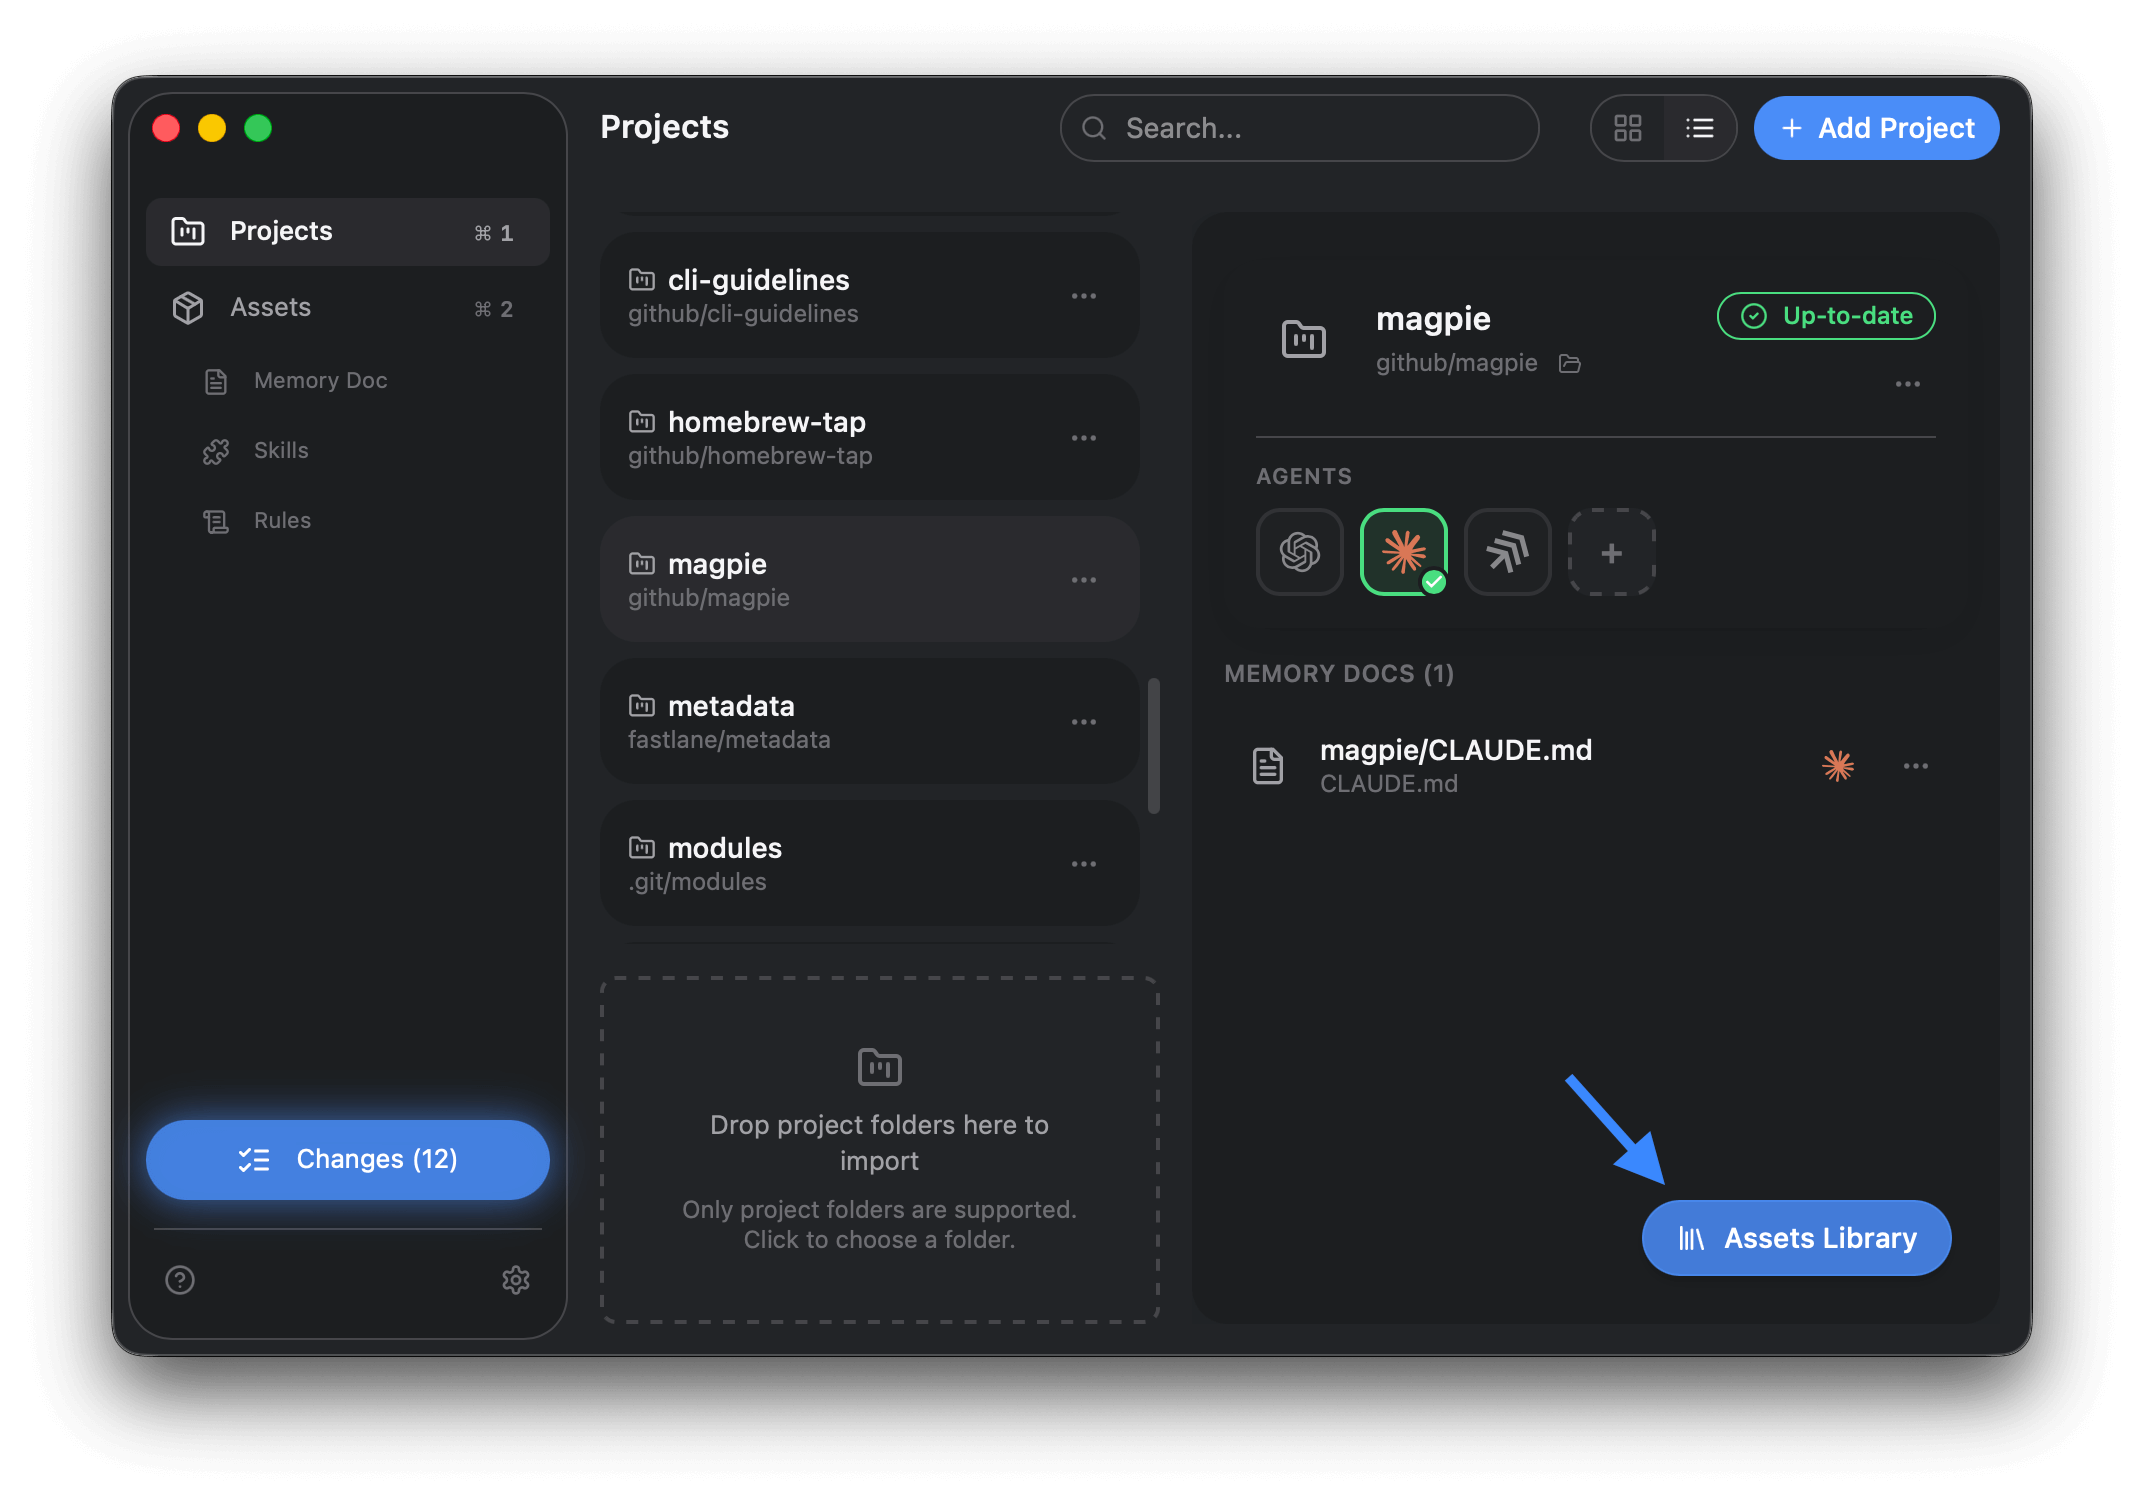
- Choose skills, memory docs, or rules to add to this project.
- Click Assets Library.
-
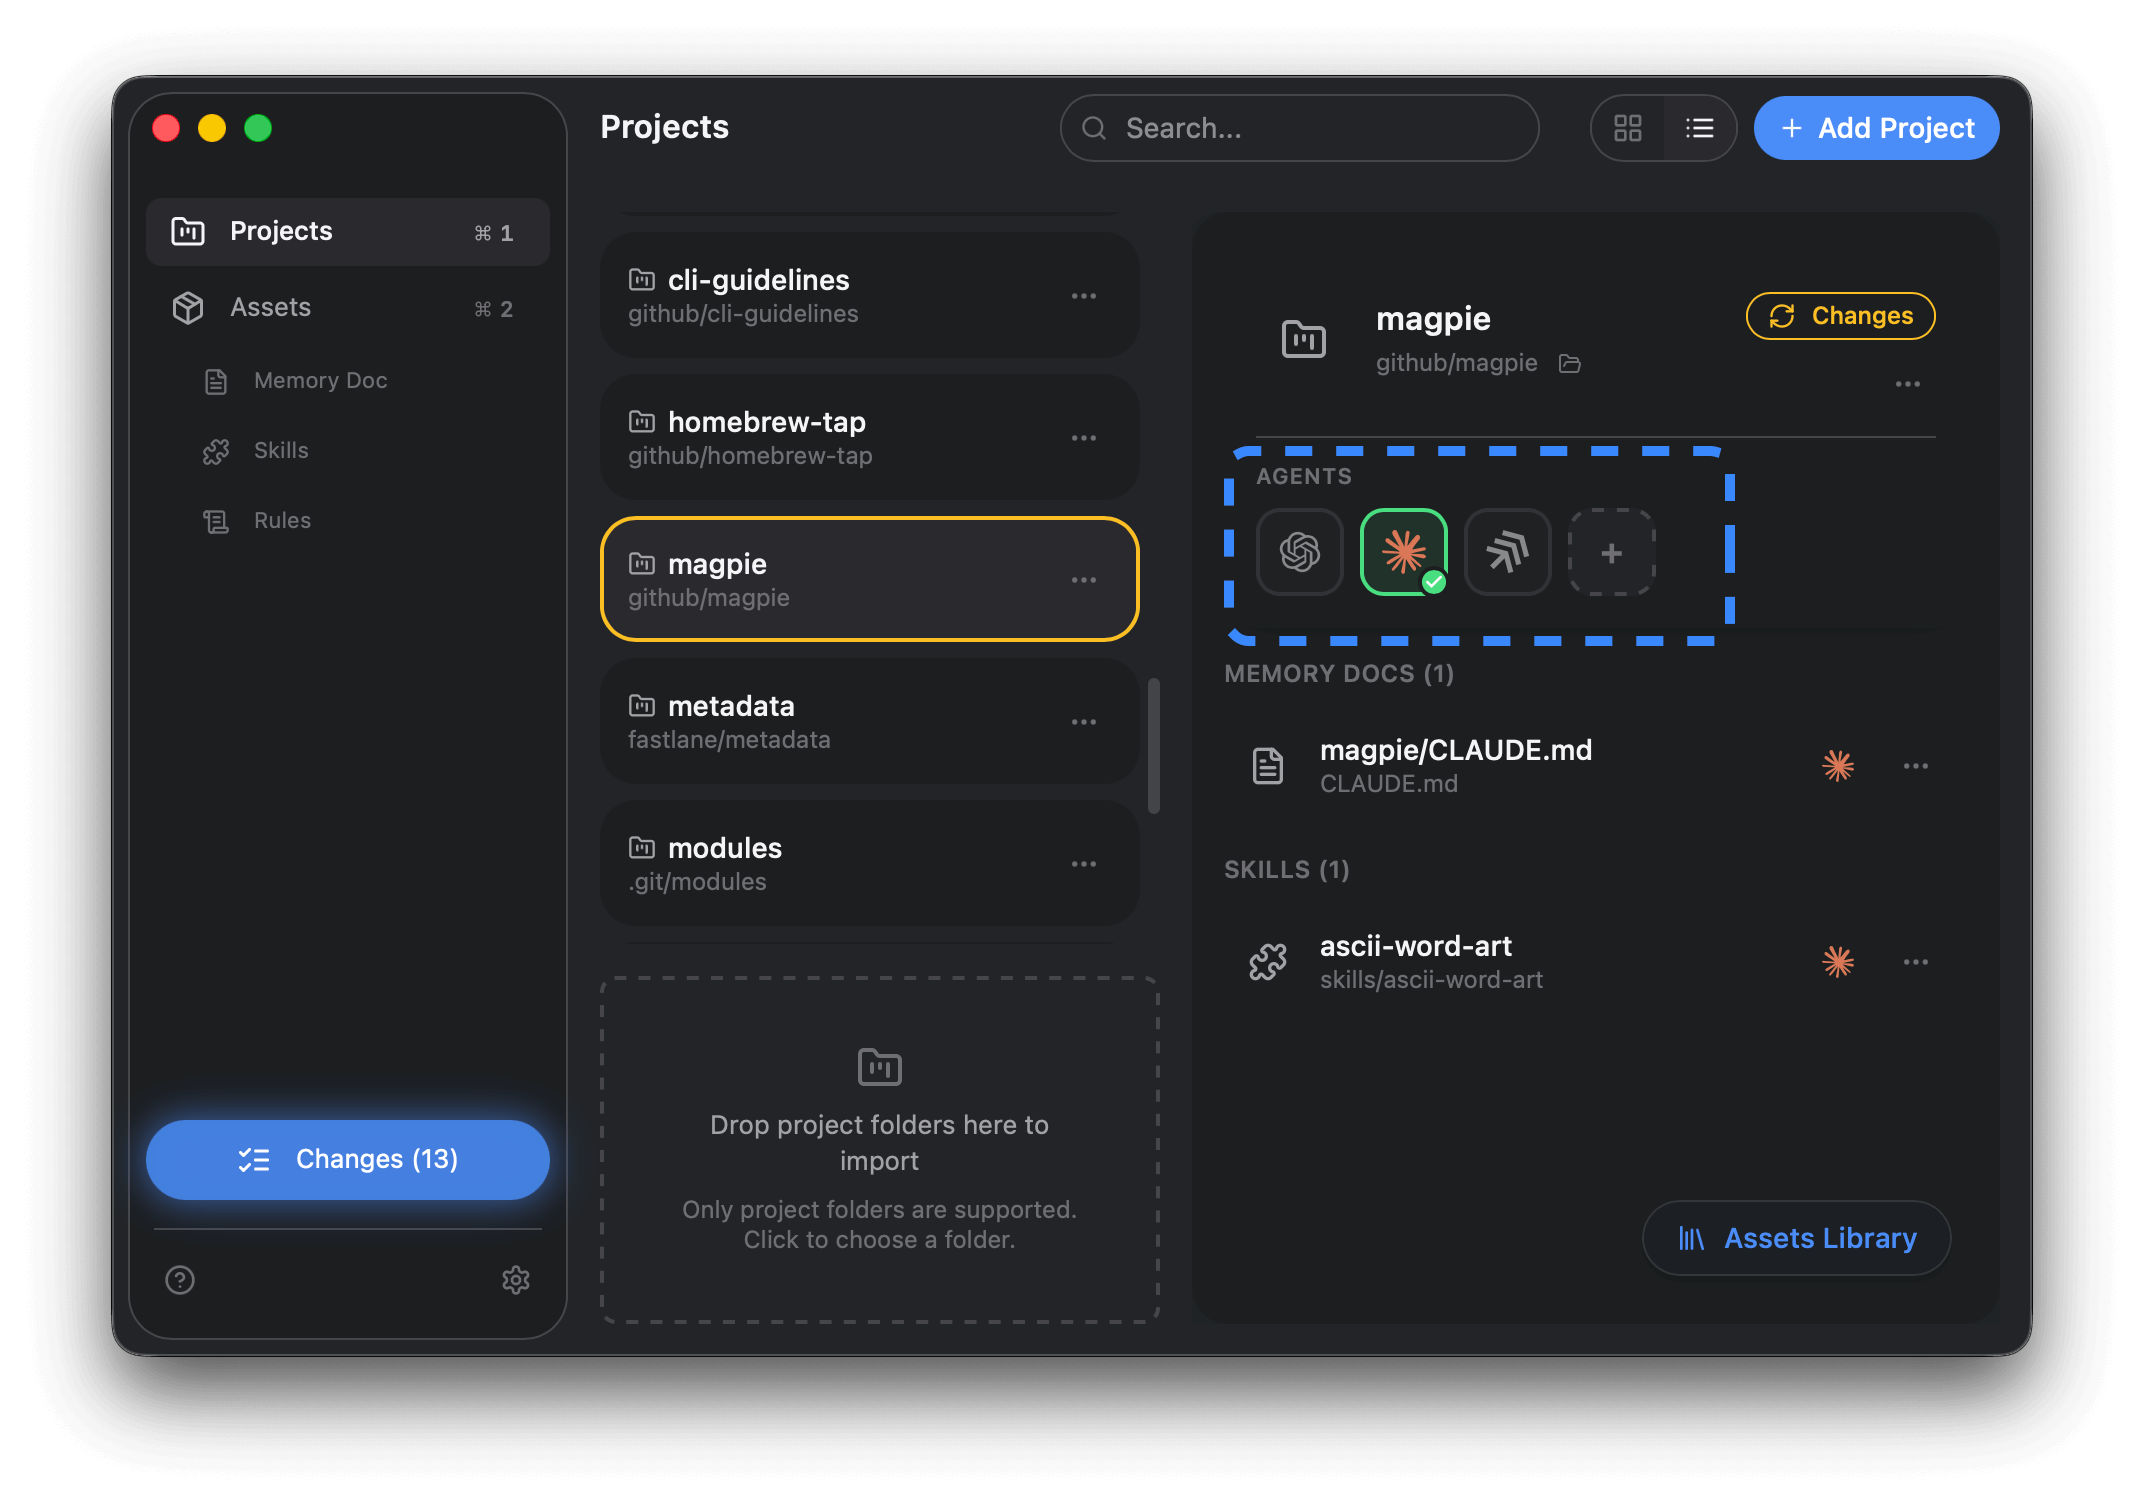
Set agents for the project
- Use the Agent Row to enable or disable agents for the whole project.
- If multiple memory docs are available, pick the one this agent should use.
- Use the Agent Row to enable or disable agents for the whole project.
-
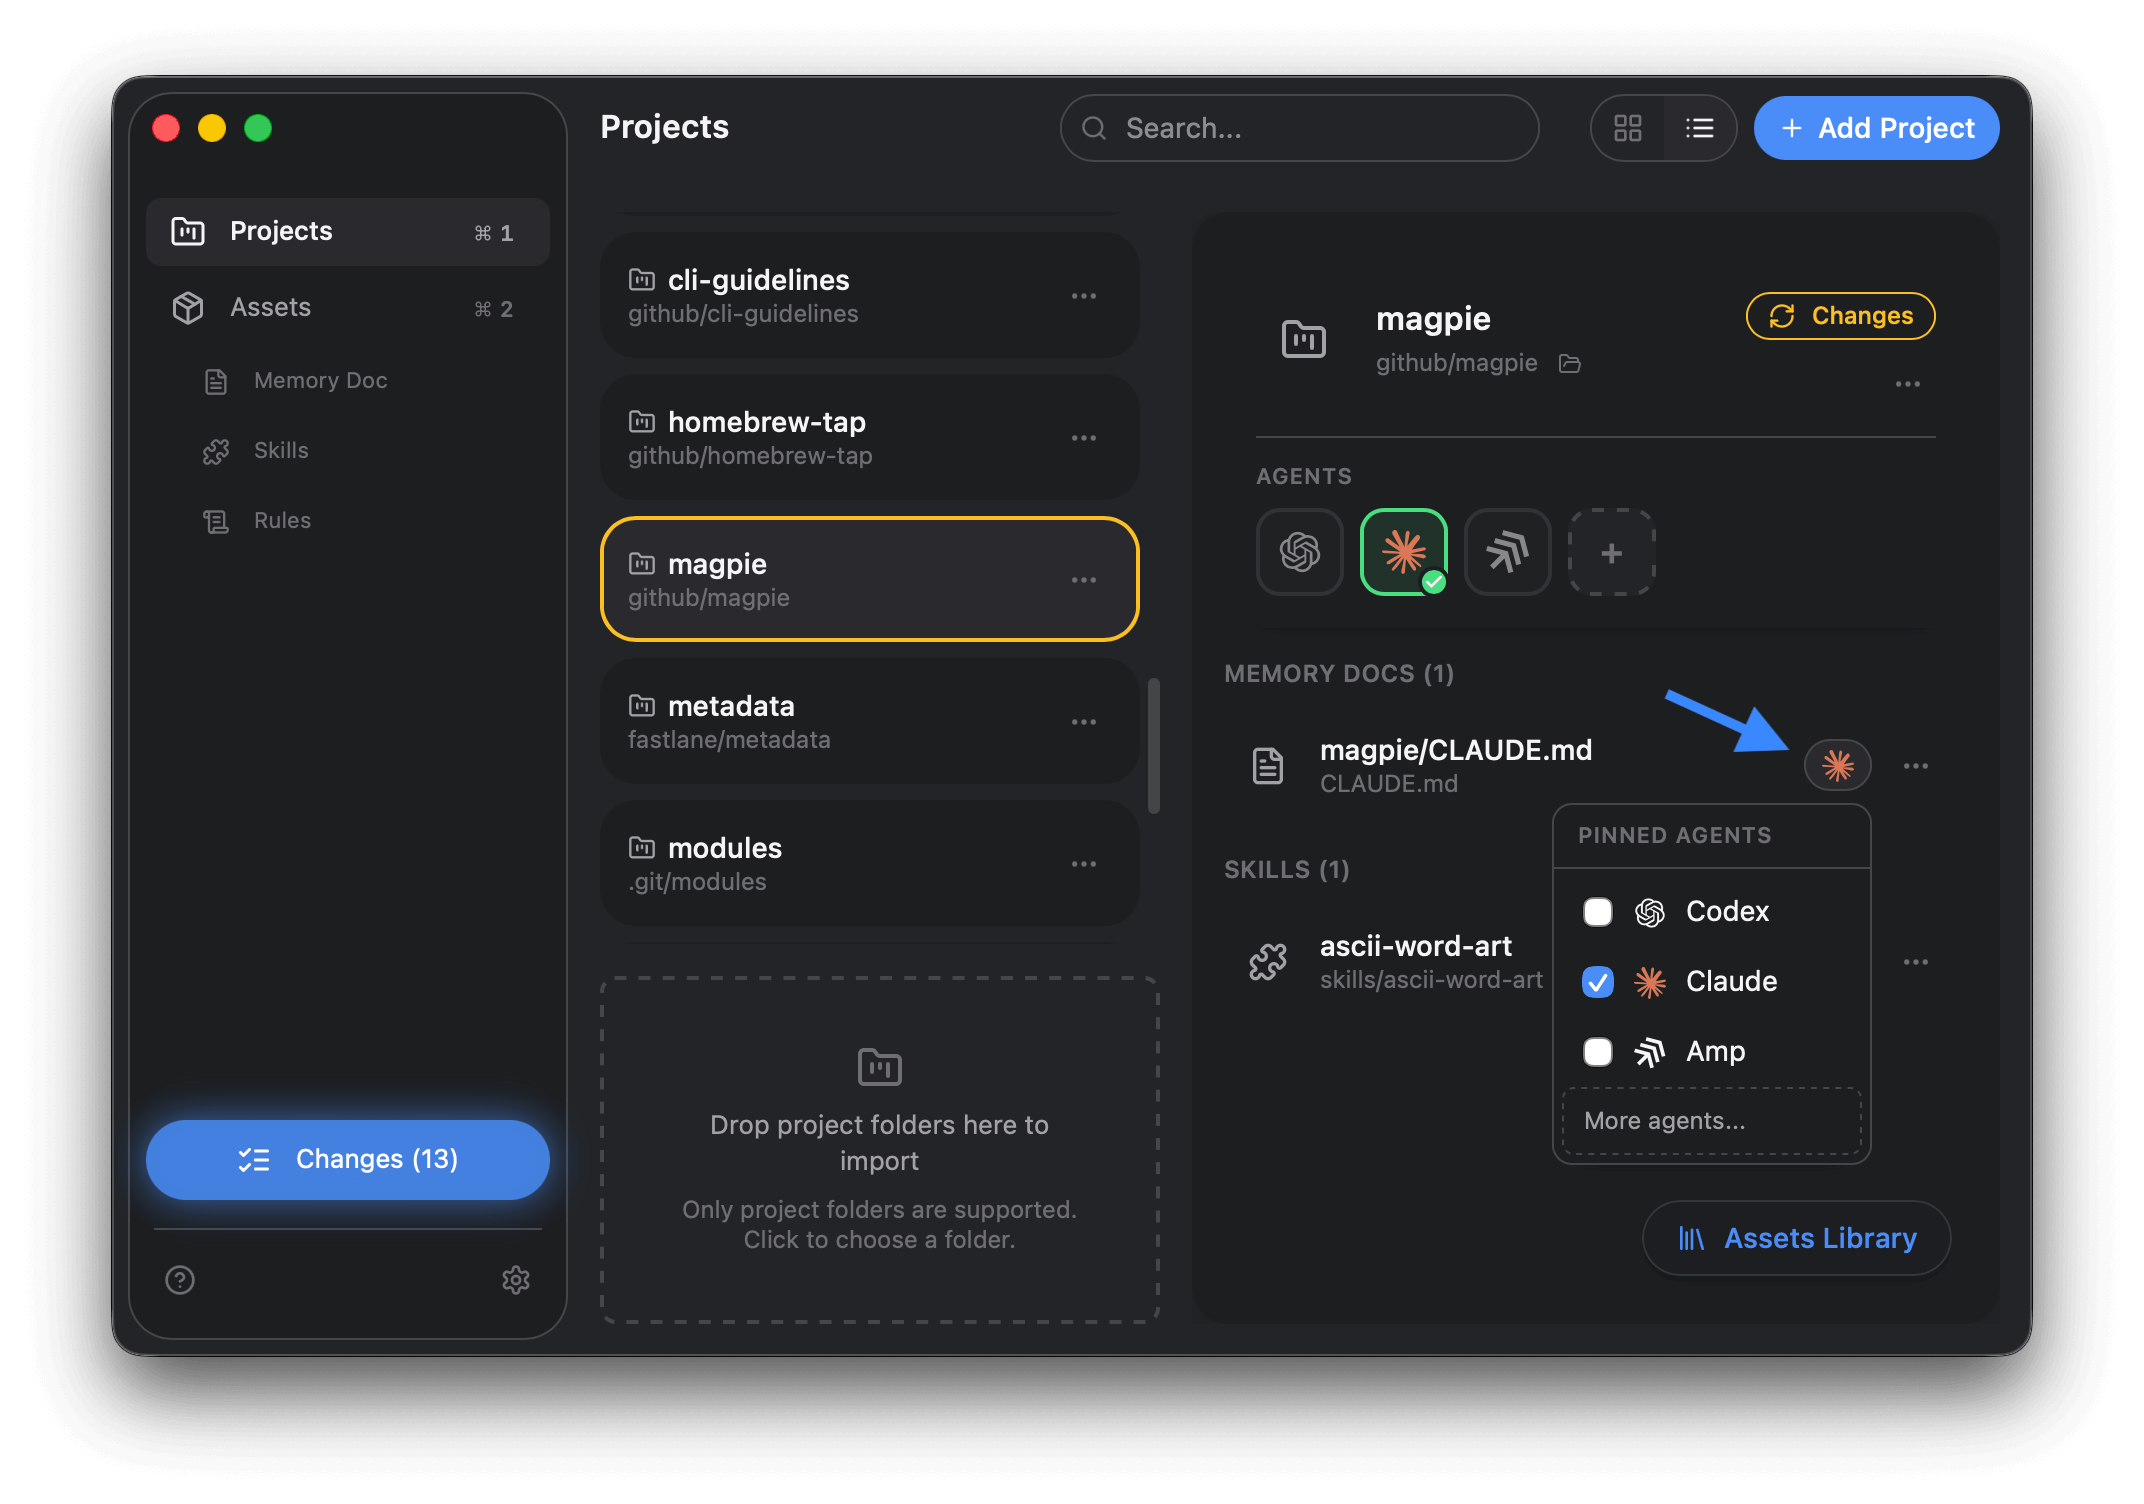
Set agents per asset
- In the asset list, click agent icons.
- In the pop-up, you can choose which agents should receive that specific asset.
- Use More agents… to see the full list.
-
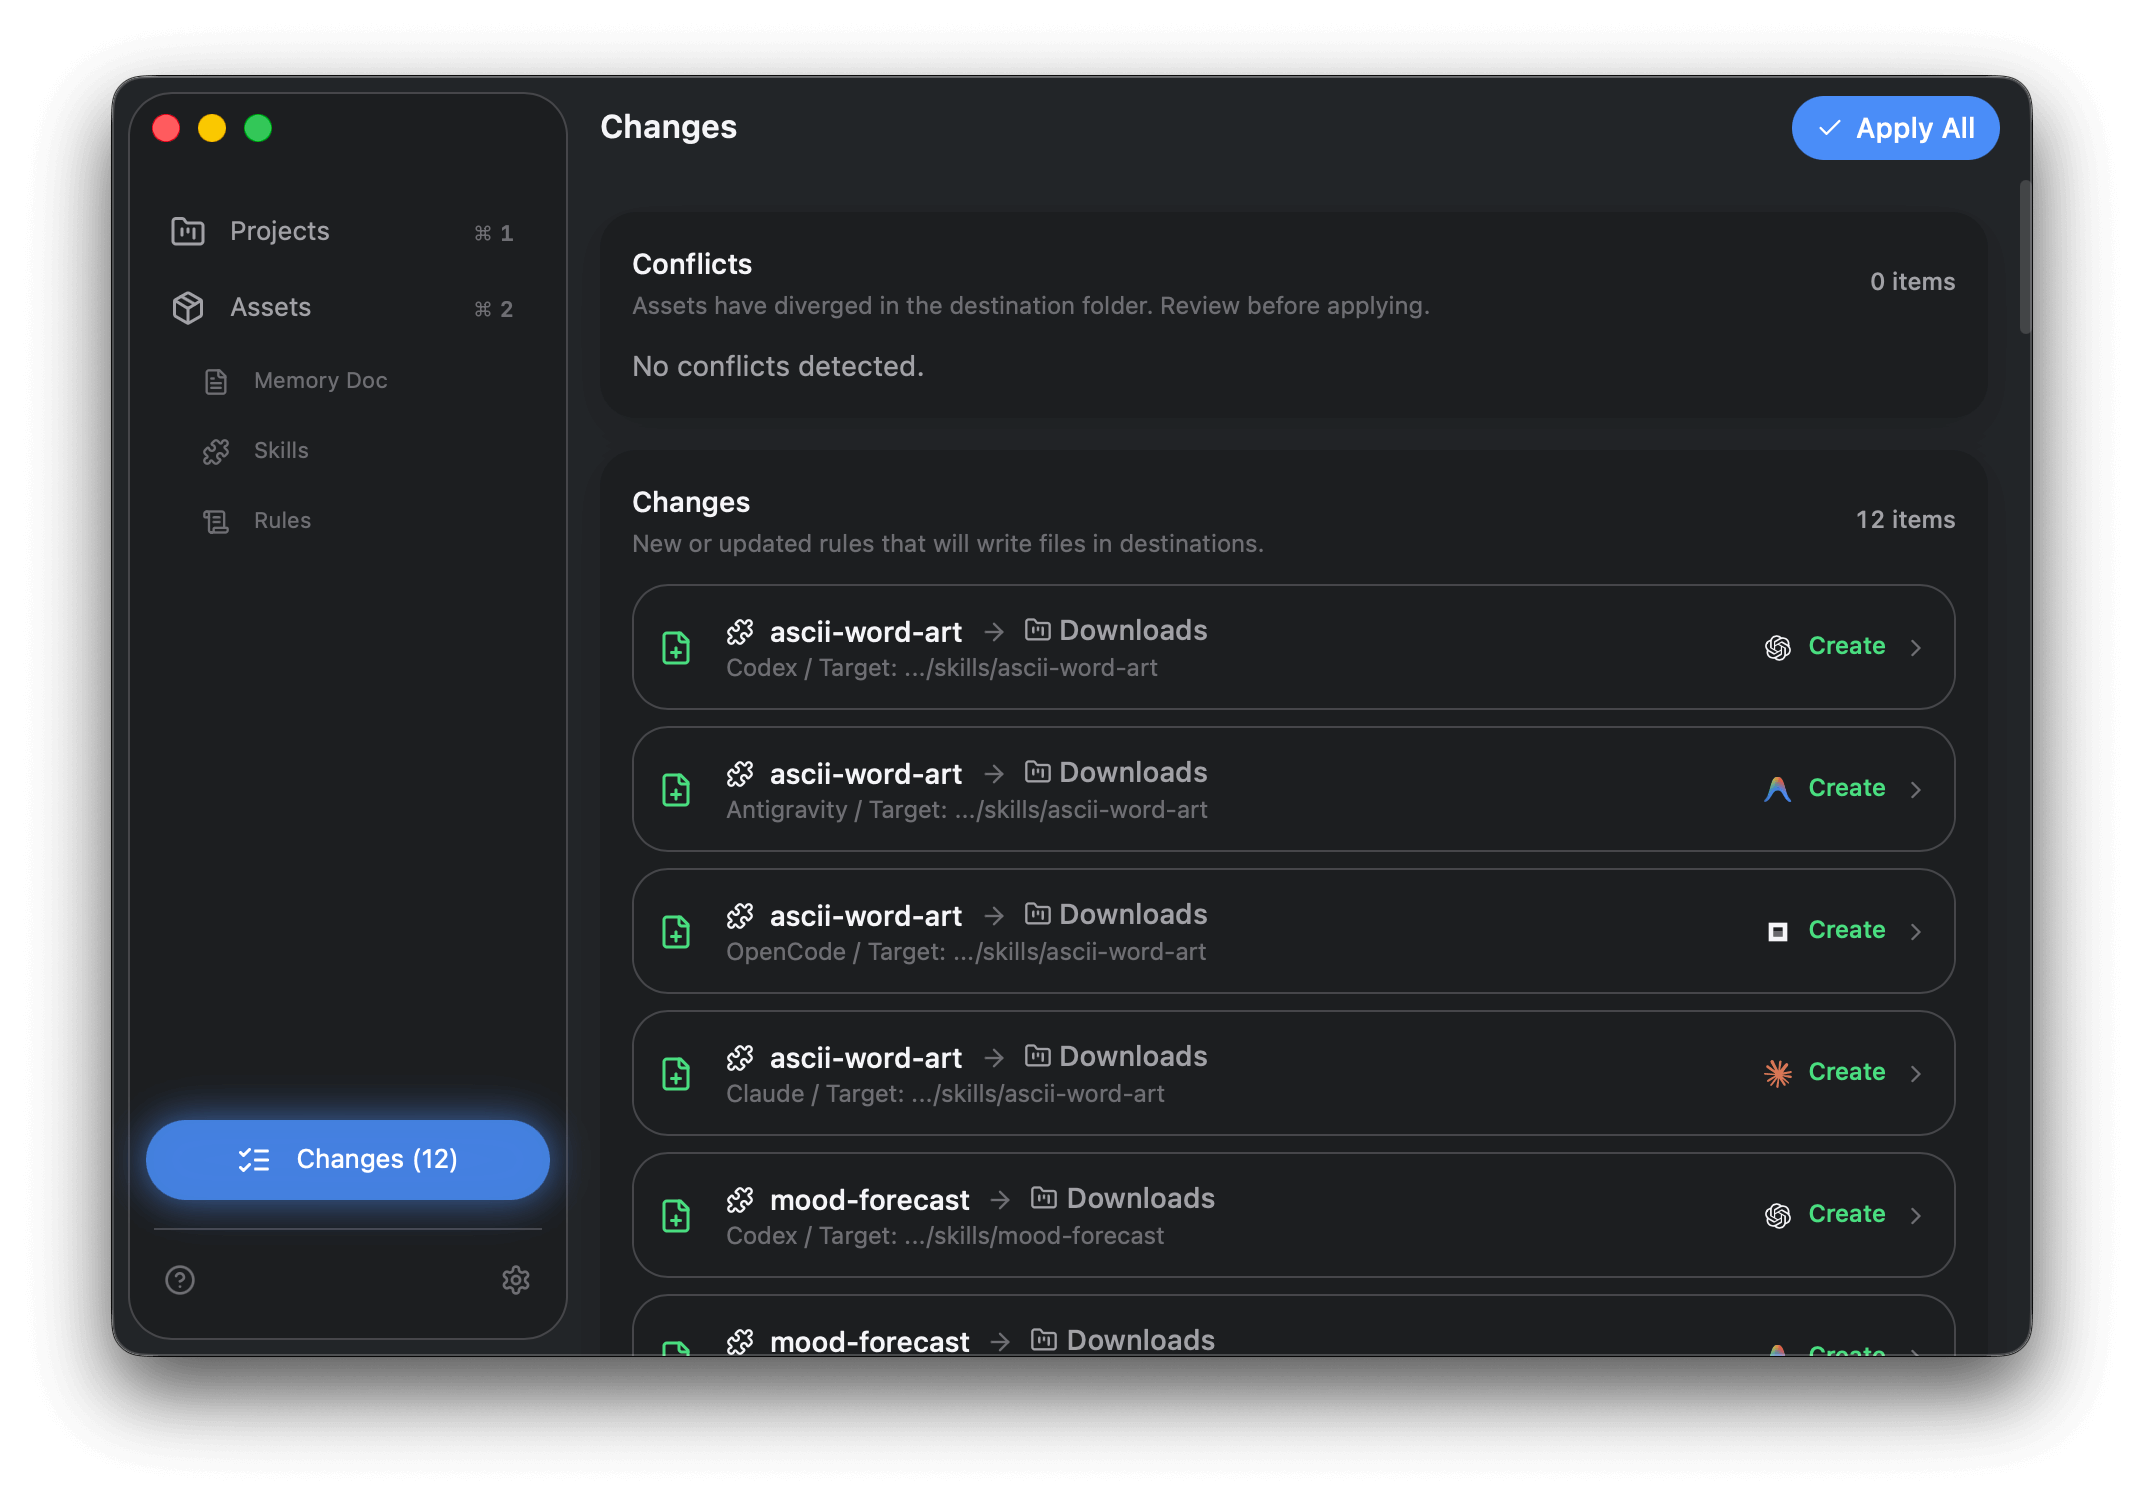
Sync the changes
- Open Changes in the sidebar.
- Review the plan and click Apply All.
Next step
Section titled “Next step”Edit an asset and publish updates: Edit & Publish Changes.