Projects
A project is an entry for any local folder you want to manage - personal repo, work repo, or any directory. Oh My Agents uses Projects as the container that connects Agents and Assets, then tracks what should be synced.
Add Project
Section titled “Add Project”Import a project
Section titled “Import a project”You can add a project in two ways:
- Drag & drop a project folder into the Projects view.
- Click Add Project and choose a folder.
What happens after adding a project
Section titled “What happens after adding a project”- The project appears in the Projects view.
- Oh My Agents scans for supported assets, imports them into the library, de-duplicates intelligently, and creates links.
- You can enable agents and attach assets.
Edit Project
Section titled “Edit Project”Project-level behavior
Section titled “Project-level behavior”- Each project can have its own set of enabled agents.
- Assets can be linked to one project or many.
- Changes for a project appear in the Changes view.
Rename a project
Section titled “Rename a project”Open a project and choose Rename from the header menu.
Enable or disable agents
Section titled “Enable or disable agents”In the project detail view, use the agent selector to enable or disable agents for this project. Each agent shows one of three states:
- All selected: all compatible assets in this project are linked to the agent.
- Partially selected: only some compatible assets are linked to the agent.
- Not selected: the agent has no linked assets in this project.

To add more agents, use the + button at the end of the selector. You can confirm which agents are supported in Settings.
Scan again
Section titled “Scan again”Use Scan Again in the project header menu to import newly added files without changing existing links. For example, if you installed a new Skill outside Oh My Agents or added new agent files that haven’t been tracked yet, Rescan Projects will pull those assets into your library and create the appropriate links to the project and supported agents.
Reveal in Finder
Section titled “Reveal in Finder”Click Reveal in Finder to open the project folder in macOS Finder.
Remove a project
Section titled “Remove a project”Use Remove in the project header menu to detach the project from Oh My Agents.
- If you see Changes or Conflicts badges, open the Changes view to review.
- You can rescan all projects from Settings → Importing → Rescan all projects.
Assets Operation
Section titled “Assets Operation”Add assets to a project
Section titled “Add assets to a project”Open Assets Library in the project detail view and pick the assets you want to add.
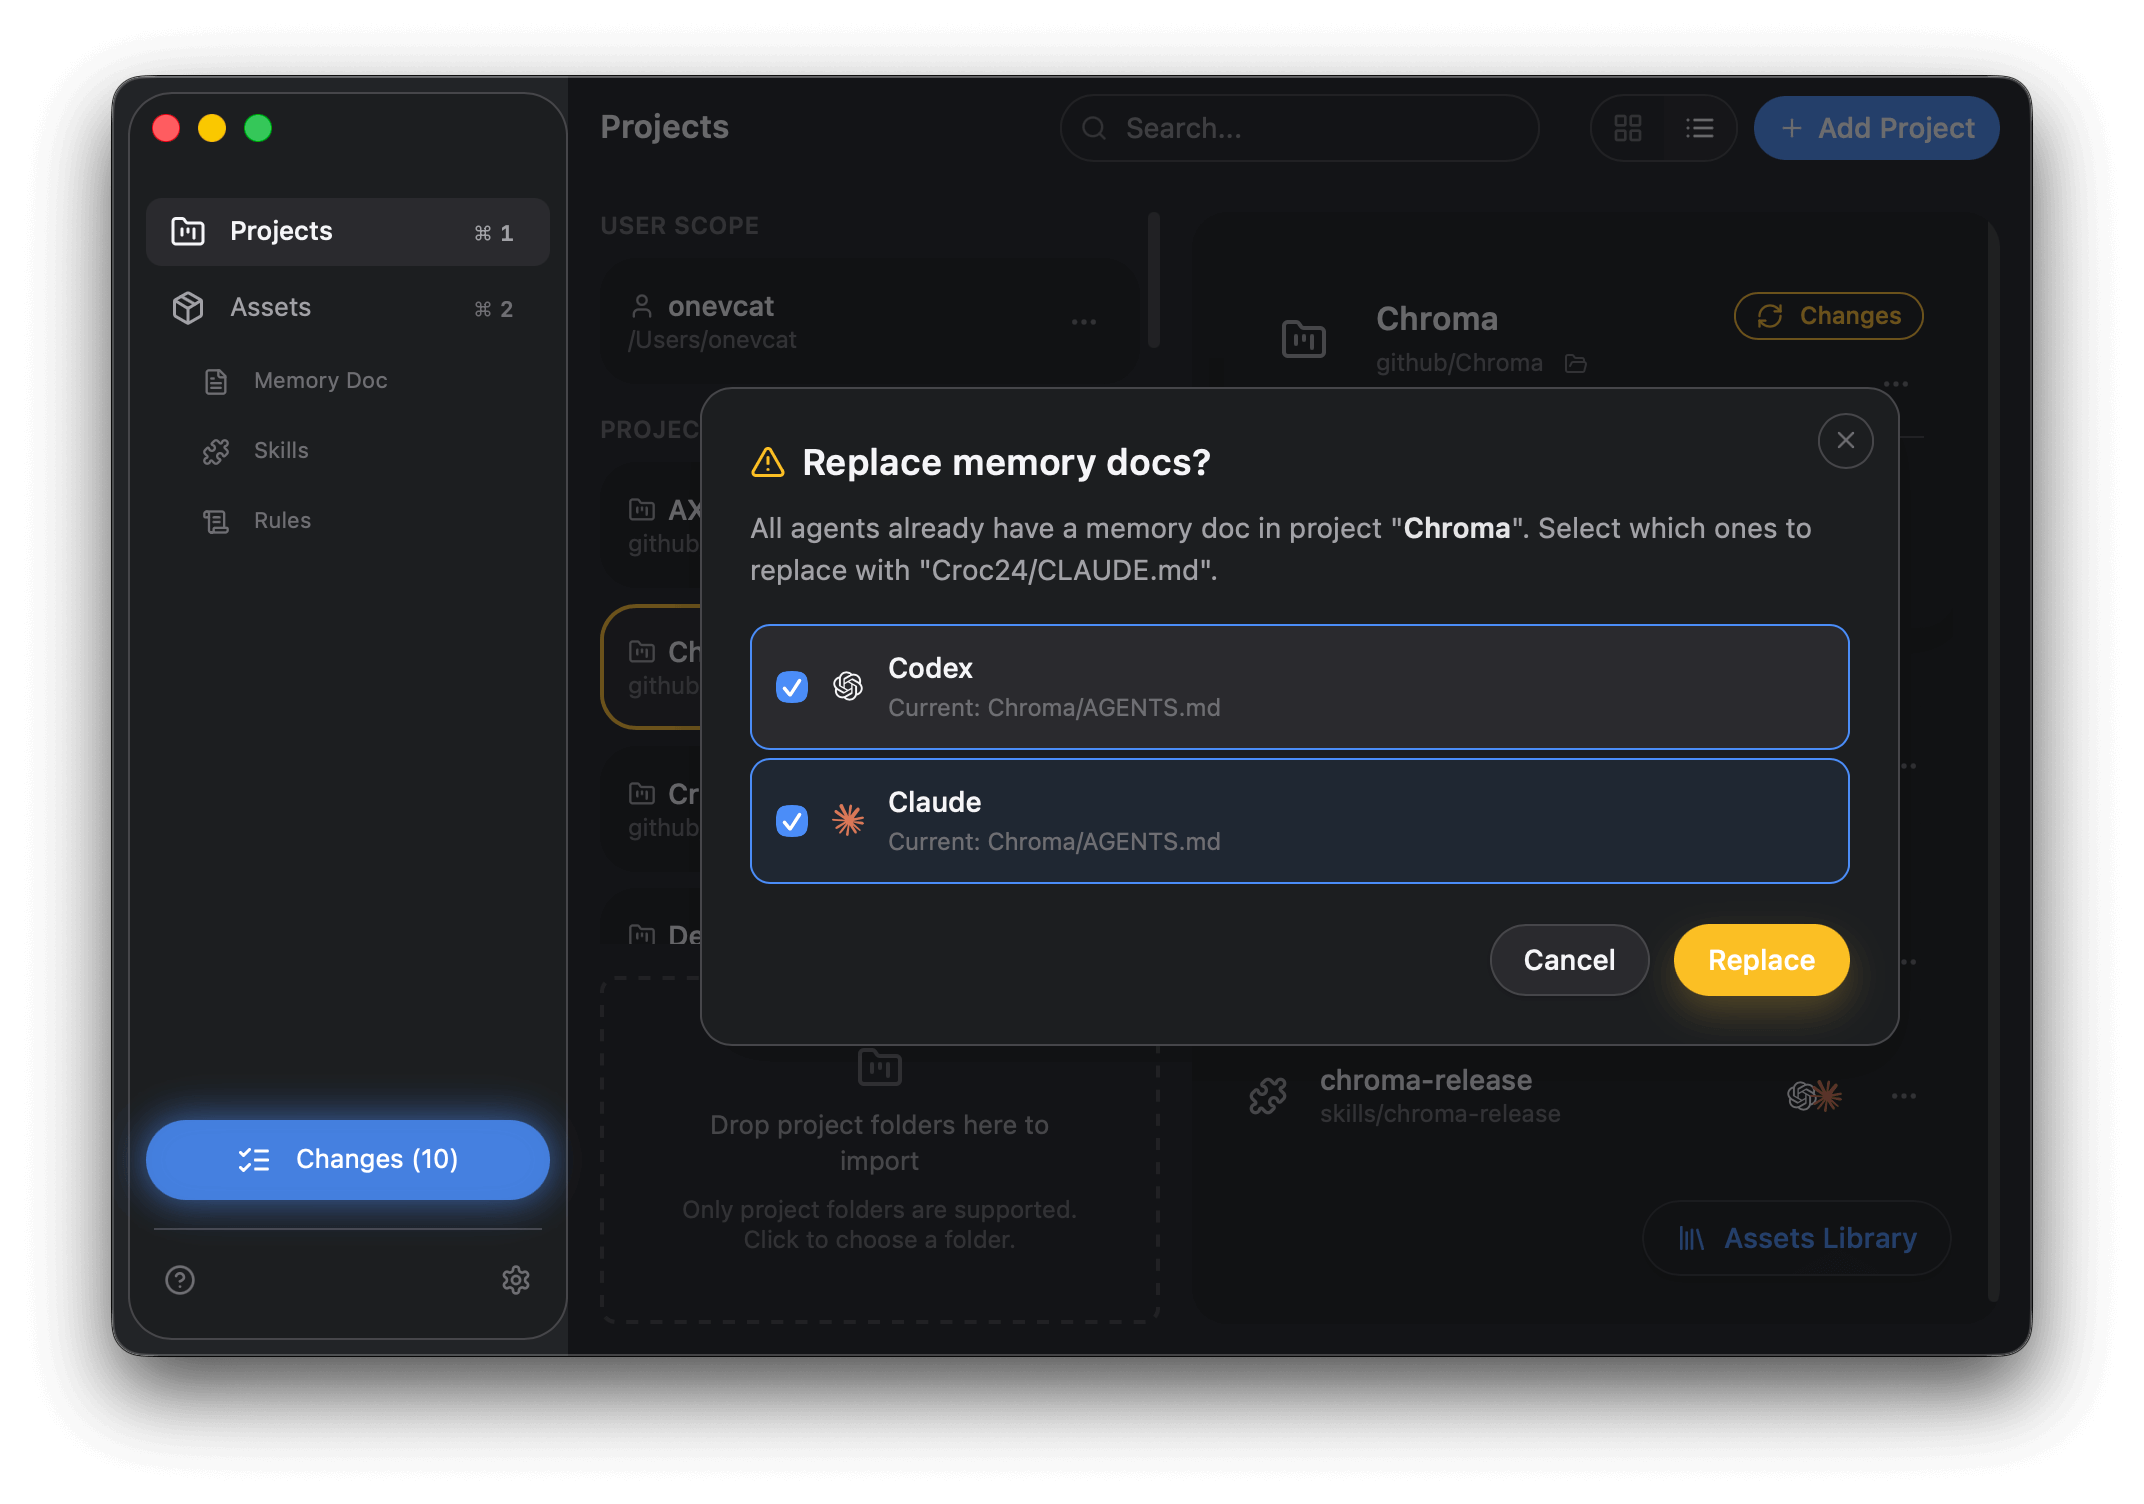
After you select assets, Oh My Agents automatically adds them to every supported agent that has no conflicts. If there are conflicts or files already exist in the target paths, a prompt appears so you can choose how to proceed.
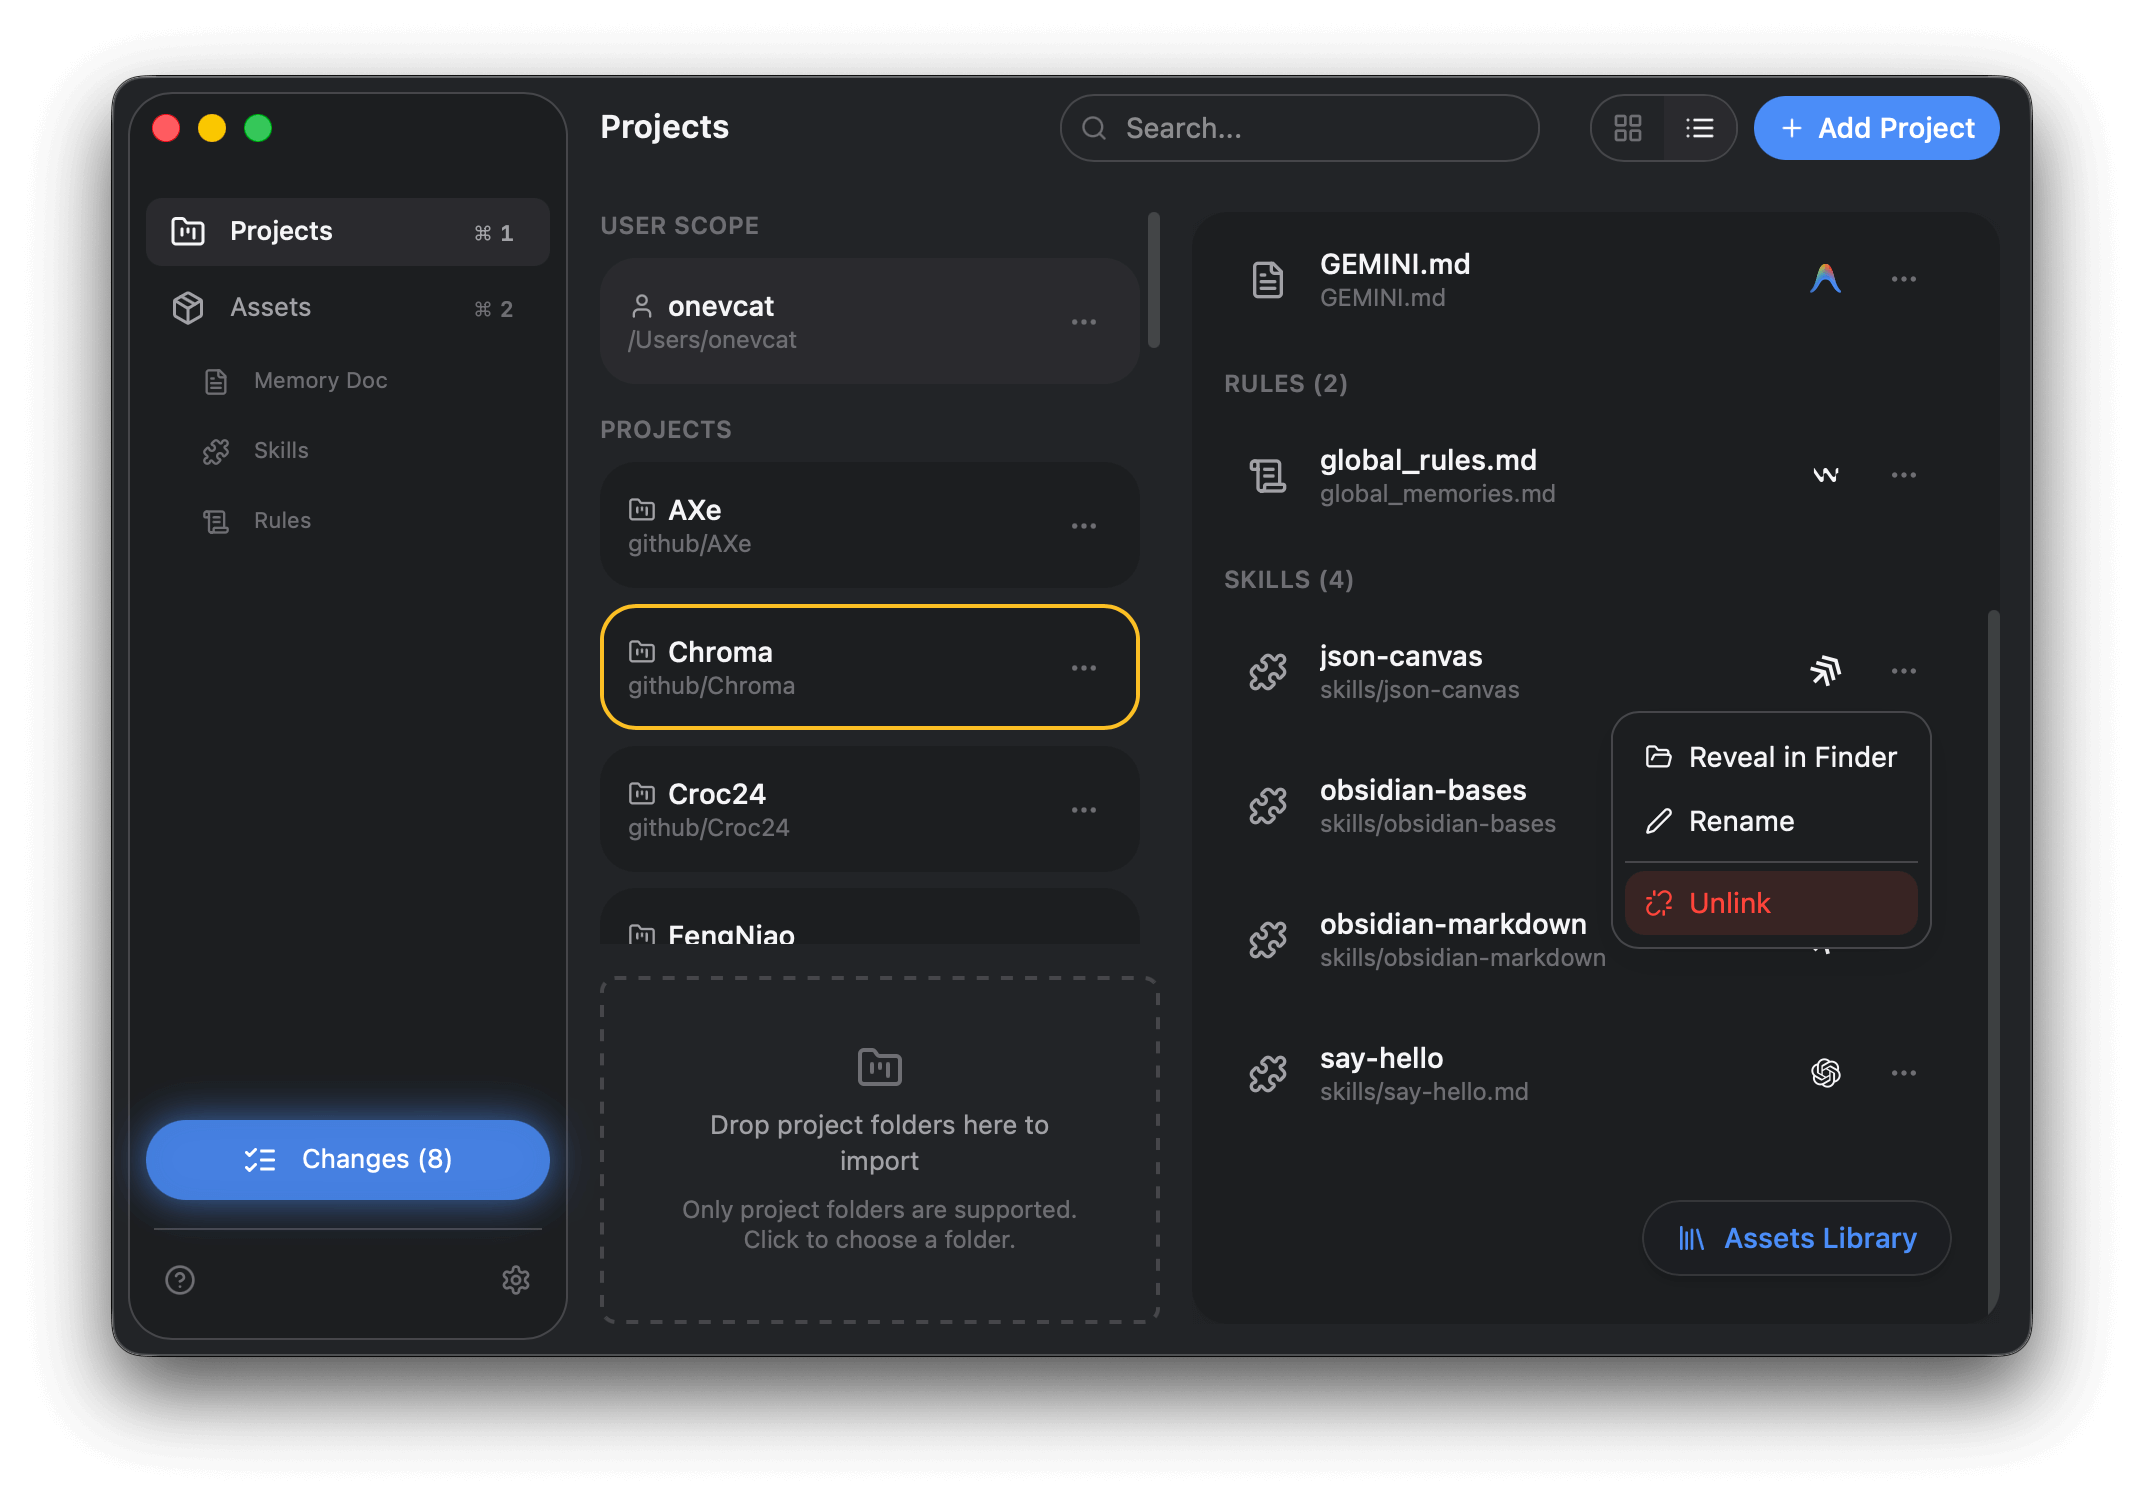
Unlink assets
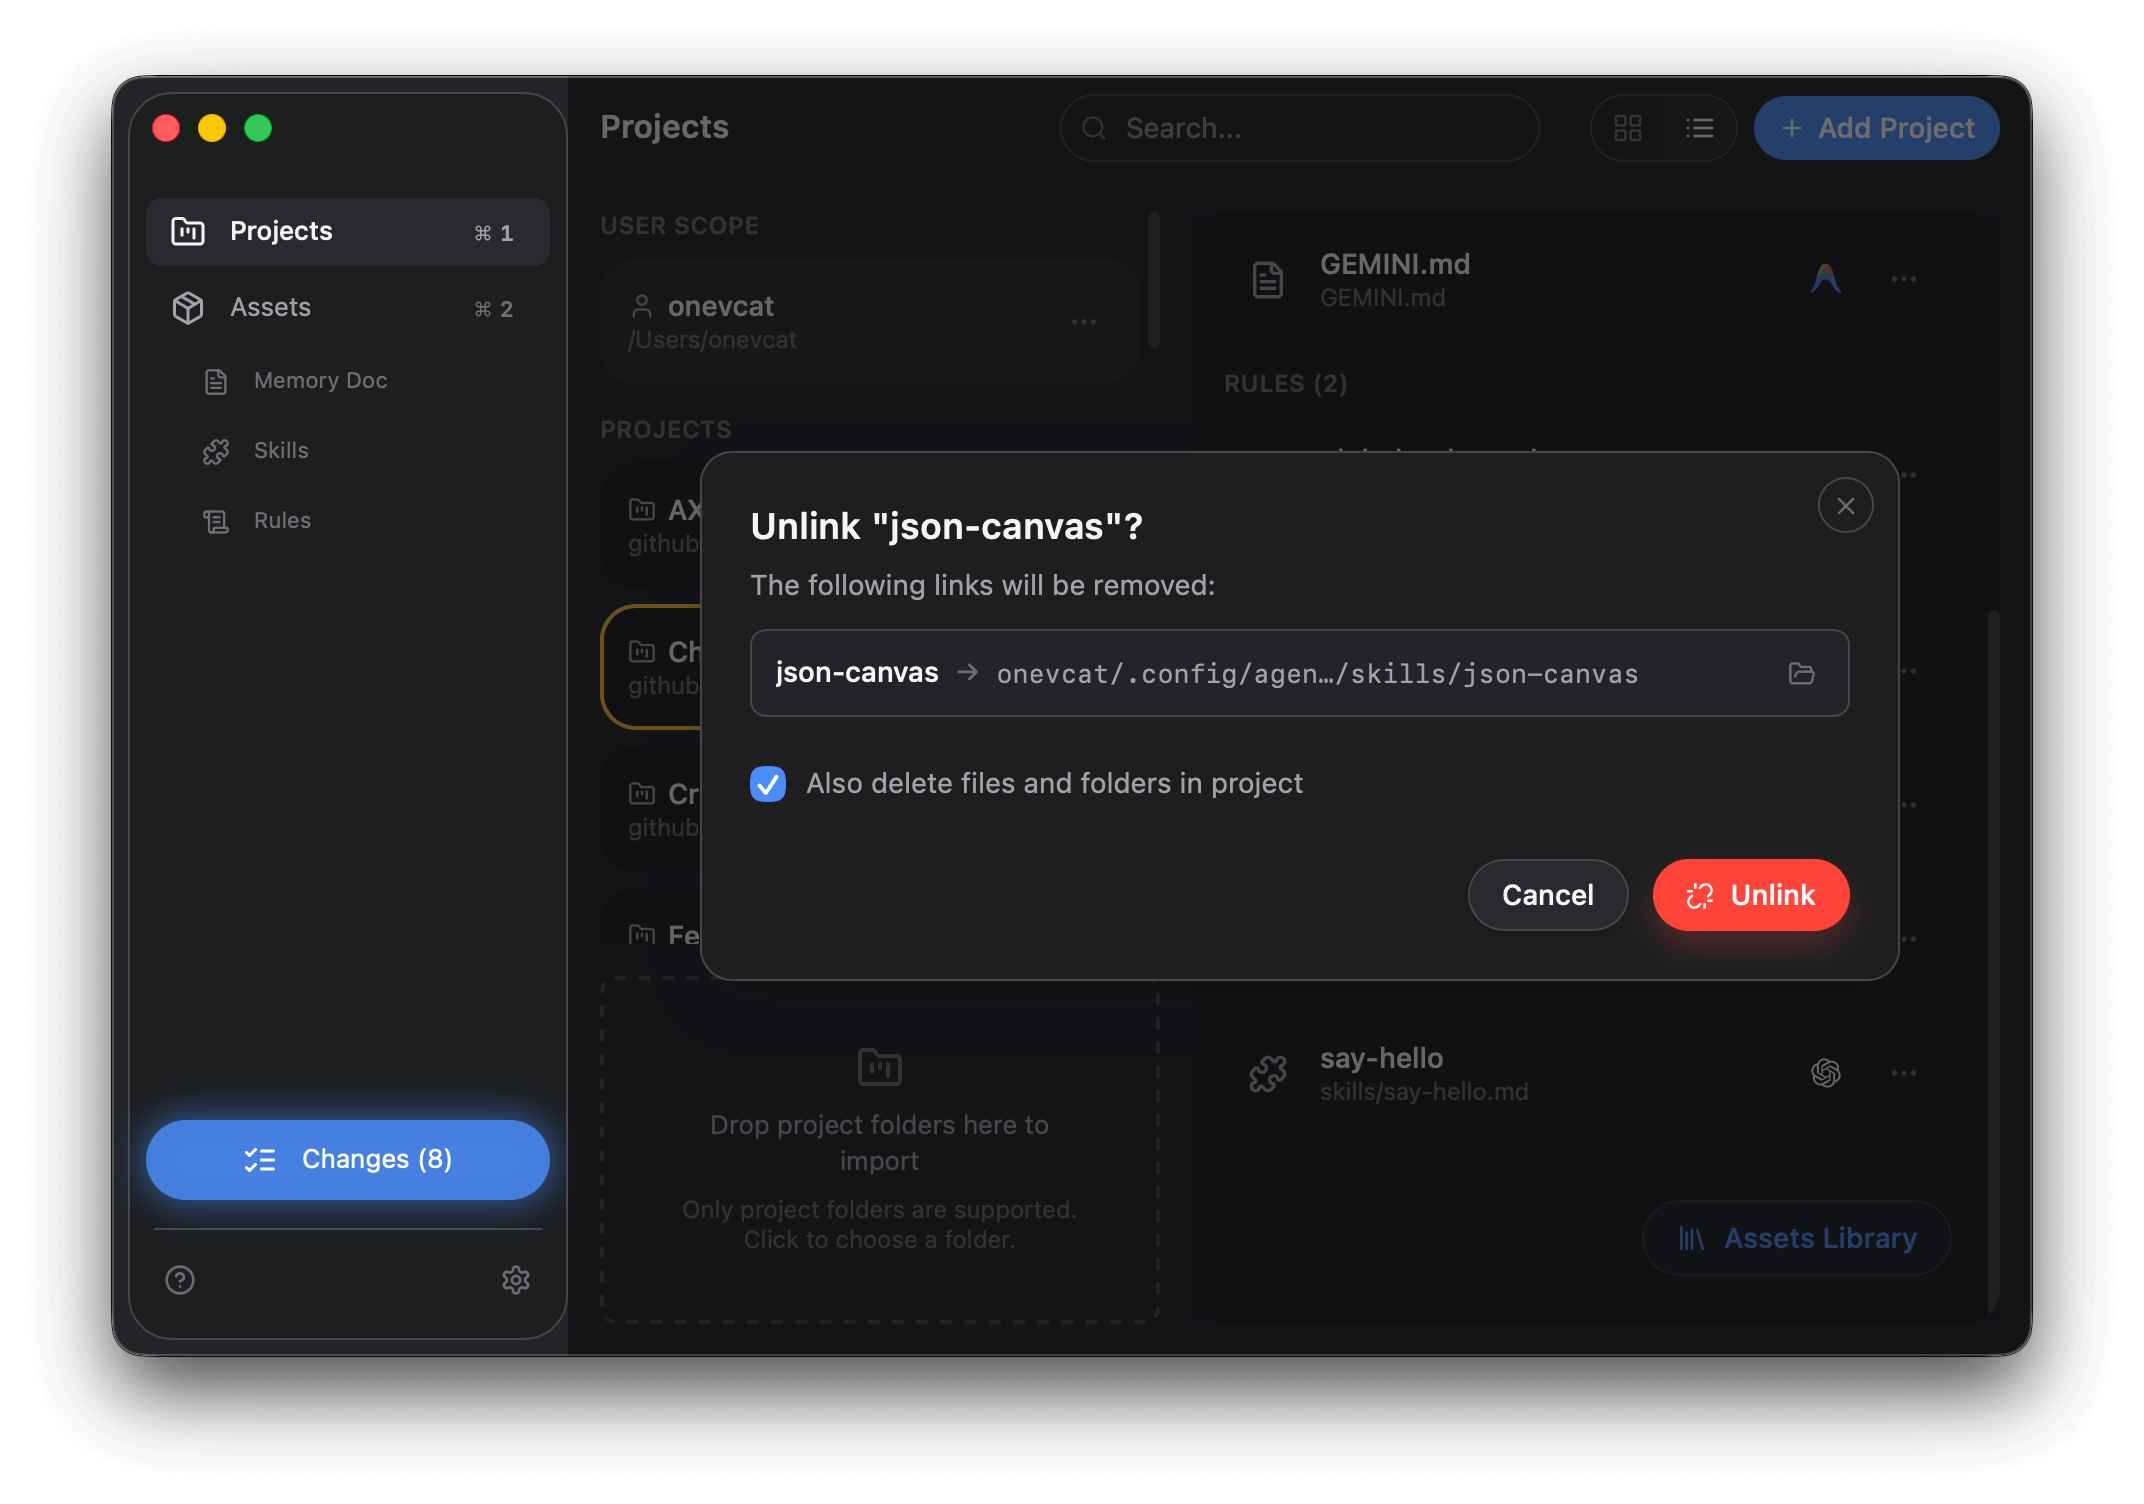
Section titled “Unlink assets”To remove a single asset from a project, open the asset card menu and choose Unlink.
Unlinking removes the asset configuration for this project and its linked agents. It only breaks the management link and does not delete files in the target folders. If you want to delete the corresponding files or directories at the same time, select Also delete files and folders in project.
Reveal assets
Section titled “Reveal assets”Use Reveal in Finder on an asset to open the folder where the asset is stored for this project. If an asset is linked to multiple agents, Oh My Agents opens a Finder window for each agent. If the link exists but changes haven’t been applied yet and no files exist on disk, the button does nothing.